
Dealing with a severe infection on a Windows machine can be an incredibly stressful experience, especially given the sophisticated nature of cyber threats in 2026. From stealthy background cryptominers to aggressive ransomware variants that lock away personal data, malicious software is designed to embed itself deeply within the operating system. Understanding the correct protocol to safely remove malware and responding methodically is critical to minimizing data loss and restoring system integrity.
Many users panic and resort to drastic measures like completely formatting their hard drives at the first sign of trouble. While a clean installation is sometimes necessary for severe compromises, most modern malware infections can be systematically isolated and eradicated without sacrificing your personal files. The key lies in executing a structured removal process rather than relying on haphazard, unverified tools.
Recognizing the Symptoms of an Infection
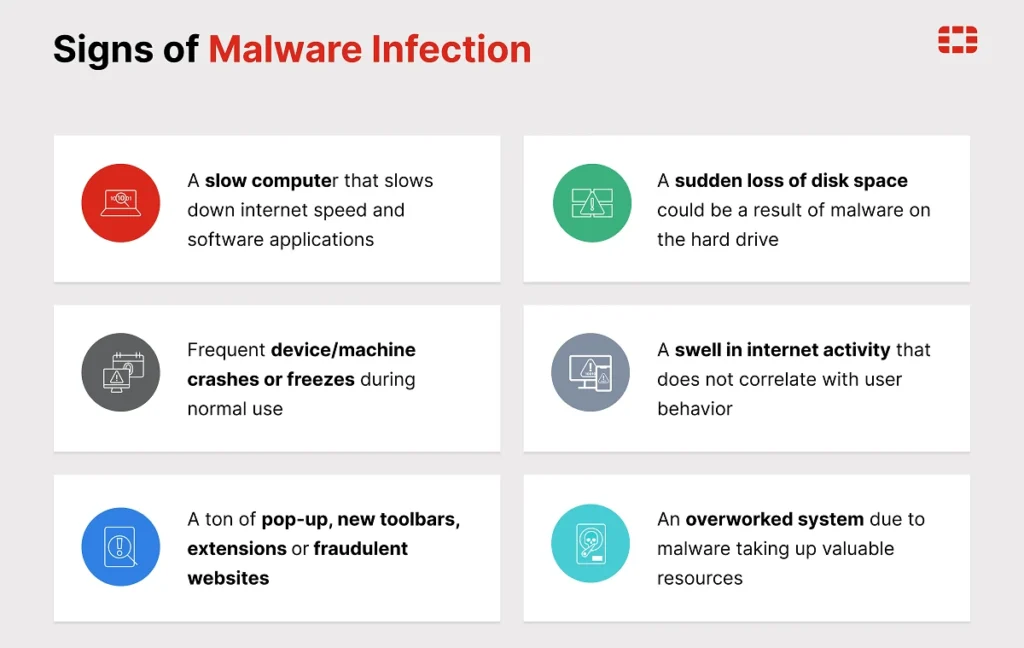
Before initiating the removal process, it is important to confirm that your system is actually compromised. Modern malware often attempts to operate silently to maximize its dwell time, but there are distinct behavioral anomalies to watch for. A sudden, severe degradation in processing speed, unexpected browser redirects, and the spontaneous disabling of native security tools are all primary indicators of a hostile presence.
Additionally, you might notice unexplained spikes in network activity or a flooded temporary files folder. If your computer begins displaying excessive pop-up advertisements directly on the desktop or if core administrative functions like the Task Manager become inaccessible, a malicious payload has likely bypassed your initial defenses and executed successfully.
Entering Safe Mode to Prevent Further Damage
The first operational step in malware removal is severing the malicious program’s ability to communicate with external command servers and stopping it from loading into active memory. This is achieved by booting the Windows environment into Safe Mode. Safe Mode loads only the absolute minimum drivers and services required for the operating system to function, effectively paralyzing most third-party applications, including the embedded malware.
To initiate this state, users should navigate to the system recovery settings and instruct the machine to restart in Safe Mode without networking capabilities. Detaching the machine from the internet during this phase is a crucial isolation tactic. For specific hardware configurations, consulting official Windows recovery options can provide the precise keyboard shortcuts needed to access the advanced startup environment during the boot sequence.
Executing a Comprehensive Malware Scan
Once the system is securely isolated in Safe Mode, you must deploy a reliable security suite to hunt down the malicious files. Relying solely on the native Windows protections is often insufficient for entrenched threats, as advanced malware specifically targets and disables these default programs upon entry. Instead, utilizing a dedicated, third-party on-demand scanner is highly recommended for deep system cleansing.
When selecting your defensive tools, it is vital to utilize reputable software known for high detection rates and frequent signature updates. If you do not already have a premium suite installed, you will need to download a standalone scanner using a clean secondary device and transfer it via a USB drive. For users looking to permanently upgrade their defensive posture after the cleanup, evaluating the best antivirus software available on the market is a necessary step to prevent repeat infections.
Addressing Persistent Threats and Browser Hijackers
Occasionally, a standard comprehensive scan will eliminate the primary payload but leave behind frustrating remnants, such as browser hijackers or altered registry keys. These remnants can continue to track your search habits or forcefully redirect your web traffic even after the core virus is deleted. Addressing this requires a targeted approach, focusing specifically on browser extensions, custom search engine parameters, and hidden application data folders.
Understanding the different types of security tools at your disposal can significantly streamline this secondary cleanup phase. Integrating multiple layers of specialized software ensures that no residual files slip through the cracks.
| Tool Category | Primary Function | Ideal Use Case |
| Real-Time Antivirus | Active background monitoring and prevention | Everyday continuous system protection |
| On-Demand Scanners | Deep system analysis without background running | Removing deeply entrenched existing infections |
| Adware Cleaners | Targeted removal of browser hijackers and tracking cookies | Fixing browser redirects and unwanted toolbars |
Post-Removal System Recovery and Hardening
After the malicious files have been successfully quarantined and deleted, the final phase involves restoring normal operations and hardening the system against future attacks. Reboot your computer back into normal operating mode and verify that the initial symptoms have disappeared. Immediately clear your browser caches, temporary files, and DNS resolver cache to flush out any lingering, non-executable malicious data.
The most critical action following a successful malware removal is comprehensive credential rotation. Because many modern threats focus on keylogging and session hijacking, you must assume that any passwords entered while the machine was infected are now compromised. Update your operating system to patch any vulnerabilities the malware exploited, enable multi-factor authentication on all sensitive accounts, and ensure your real-time protection is active and fully updated.